Logowanie/en
Przejdź do nawigacji
Przejdź do wyszukiwania

< HPC User Guide < Access to HPC < Logging
To log in to the computational resources (Supernova) you need an SSH client on your computer. You may choose the way you log in to the system from the possibilities described below.
SSH from Linux
Loggin in to Supernova:
ssh username@supernova.wcss.pl
Switch on X11 forwarding if you need to run GUI:
ssh -X username@supernova.wcss.pl
SSH from Windows
You need an SSH client installed e.g. PuTTy.
Configure a connection in PuTTy
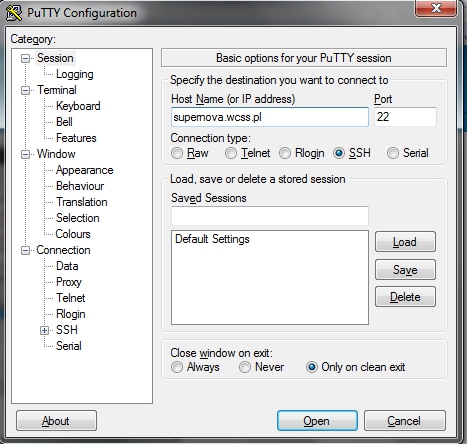
To configure a connection in PuTTy follow these steps:
- Run PuTTy
- Go to Session
- Fill the Host Name with supernova.wcss.pl
- Select Connection type as SSH

Configure a connection with X11 forwarding in PuTTy
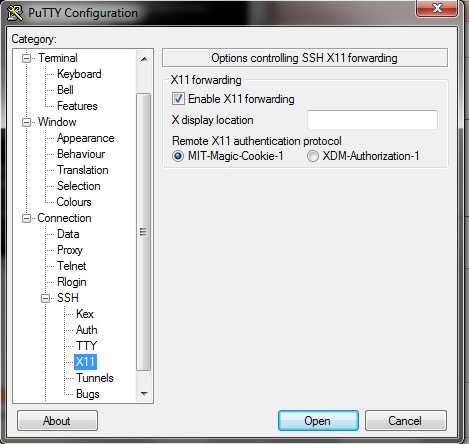
To configure a connection with X11 forwarding in PuTTy follow these steps:
- Download and install X server on your computer, e.g. X-ming.
- Run the X server installed in previous step
- Run PuTTy
- Go to Session
- Fill the Host Name with supernova.wcss.pl
- Select Connection type as SSH
- Go to Connection -> SSH -> X11
- Select Enable X11 forwarding option
- Click on Open to open the connection.

Connection with NoMachine client software
Installation and configuration
- Download the NoMachine NoMachine client package for your OS to the computer that you want to control remotely
- After completing the download, launch the installer
- Accept the license agreement and click Next and wait while Setup completes the installation
- Run NoMachine from menu Programs/Applications

- On welcome screen click Continue.
- On "Creante New Connection" screen click Continue.
- On "New Connection" > "Protocol" set NX protocol and click Continue.

- On "New Connection" > "Host" in text field Host write: ui.wcss.pl and port number 4000. Check Use UDP communication for multimedia data and click Continue.

- On "New Connection" > "Authentication" check password method and click Continue.

- On "New Connection" > "Proxy" check default option Don't use proxy and click Continue.

- On "New Connection" > "Save as" in field Name provide a name for the connection, check Create a link one the desktop and click option and click Continue.

Working with NoMachine
First steps.
- Open NoMachine from the Progams/Applications menu.
- In "Recent Connections" window click connection icon and click Connect

- In the "Connection to ui.wcss.pl" window provide Name and Password (the same as for Supernova cluster), select Save this password in the connection file and click OK.
- You can create a virtual desktop by clicking New Desktop.

- On the next screen click Create new virtual desktop and then Continue.

- In the next window you are informed how to access the NoMachine control menu - by clicking the up-right corner of the window or pressing CRTL+ALT+O. Click Ok on 4 next steps.


- To change the screen resolution of a virtual desktop go to Application Menu > Settings > Display. A minimal screen resolution for a comfortable work is 1024x768.
